How to Setup L2TP VPN on Chromium OS
b.VPN client for Chromium is not available yet. However, if you are a paid user and you would like to use b.VPN service on Chromium, you can manually configure L2TP VPN connection on Chromium by following the steps below. You will be granted the exact same features of using VPN client on Chromium. Notice that you can use b.VPN client on another device while you are connected to b.VPN servers on Chromium via L2TP.
Important Notes:
*Click the link below to view a list of available L2TP VPN servers and the matching "Shared Key".
https://www.bvpn.com/en/accounts/profile/l2tp_server_list/
*Your username and password are your registered e-mail address and password on b.VPN.
*You have to be a paid user in order to use L2TP VPN connection.
Follow these steps to setup L2TP VPN on Chromium:
Click the status area at the bottom of your screen, where your account picture is located, click on your profile icon and then select "Settings".
In the “Internet Connection” section, click "Add connection", and then "Add private network...”.
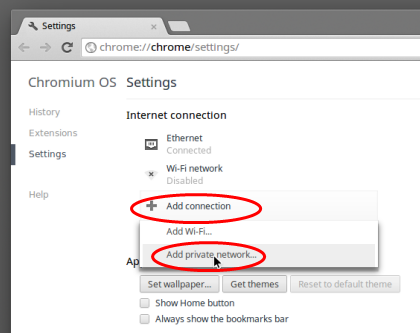
The "Add private network" window will appear.
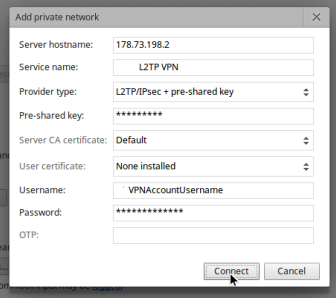
Fill the following fields:
Server hostname: server address (e.g. ca.usa.bvpn.com)
Service name: use any name you prefer (it’s recommended to use the server’s address again)
Provider type: L2TP/IPsec + pre-shared key
Pre-shared key: oorg5y8ajugiwgc
Username: your b.VPN account’s username
Password: your b.VPN account’s password
Leave the other options to their default values.
Check "Save identity and password" option.
Click "Connect".
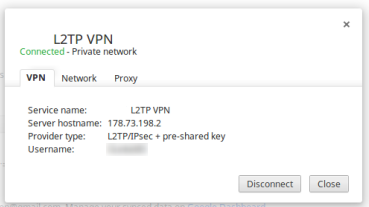
Now you have successfully configured L2TP VPN connection on Chromium.
If you want to start VPN connection automatically when your system starts, please follow the next steps:
Click on "Private network" and select your VPN connection.
Check "Automatically connect to this network" checkbox, click "Close" then close "Settings" window.